Melee
Melee characters fight from forward positions. A fighter behind an allied melee character may be blocked from making an ordinary attack.
Defeat the enemy commander before yours falls. Every character you deploy helps shape the fight that follows.
Learn the turn ↓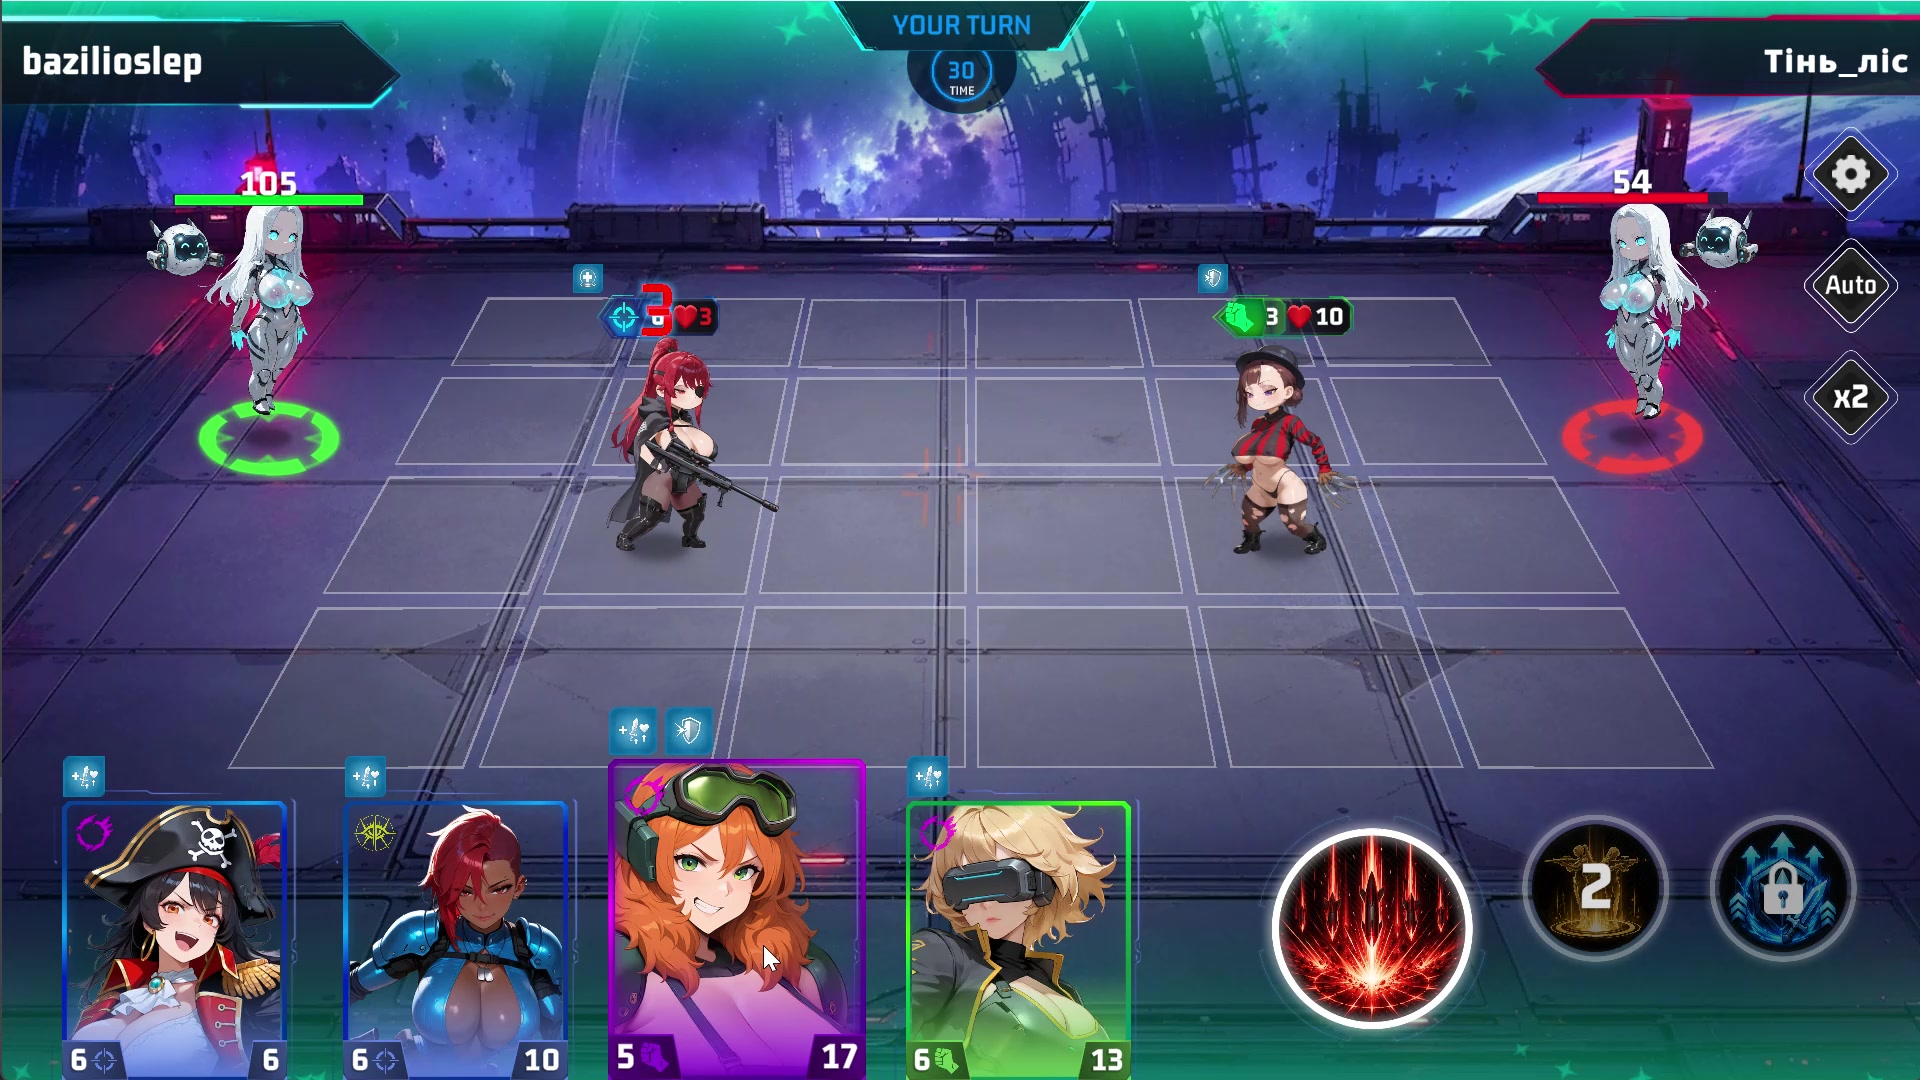
Choose your active squad and commander before starting a battle. Character development and equipped implants help determine what your crew brings to the field.
Give the squad a purpose: protect fragile attackers, combine support with damage, or build around abilities that help one another. The strongest-looking individual card is not always the best fit for the team.
Characters committed to an expedition are unavailable for your combat squad until you collect the expedition result or abort the trip.
Check your hand, exposed lanes, and available commander abilities before placing a character.
Play a character into an available position or skip placement. Deploying a character ends preparation and starts your side’s attack phase.
Your characters attack and their abilities take effect, then the opposing side takes its turn. Surviving characters stay on the field for the next exchange.
A character stays part of your formation while she survives. Consider both what the placement achieves now and what it leaves exposed on the enemy’s turn.
Melee characters fight from forward positions. A fighter behind an allied melee character may be blocked from making an ordinary attack.
Ranged characters can attack from deeper positions behind allies. Use that space to keep an attacker contributing while the front line holds.
Ordinary attacks follow a character’s lane. When no enemy character remains in that lane, attacks can reach the enemy commander. Some abilities affect different targets, so read each character’s skill descriptions.
Breaking a lane can win the battle. Leaving one open on your own side can lose it.
The commander stands apart from the characters you place on the field. Defeating the enemy commander wins the battle; losing your own ends it in defeat.
Check the commander’s active abilities during preparation. Some become available as the battle progresses. Use an available ability before deploying your next character if you want its effect for that turn.
Character abilities can protect, heal, strengthen allies, or put pressure on enemy formations. Their conditions matter as much as their effects: read the skills of the characters you actually use.
 Agility
 Shield
 Defence
 Healing
Once Auto Battle is unlocked, you can switch it on or off during a fight. Battle speed changes the pace of the action; positioning and ability rules still apply.
Read character skills → Combat glossary →League battles are a route to progression and rewards. After a fight, consider where your formation held and where it broke. A different position, a support character, or an implant can change how the next encounter plays out.
Return to the base when you need materials or a new implant for your plan.
Explore your base → Age verification required 18+
Void Sirens contains mature themes, suggestive imagery, and adult content. You must be at least 18 years old, or the age of majority in your jurisdiction.